
|
|
|
|
#1 |
|
Участник
|
stoneridgesoftware: Adjust Address on RDLC Check File and Update Checks Dynamics 365 Business Central
Источник: https://stoneridgesoftware.com/updat...iness-central/
============== When Finance or banking changes occur, you might find you need to order new check stock! Maybe you have a new printer and its printing a little more to the left? Or perhaps you ordered window envelopes and the address doesn’t quite line up? New check stock, new envelopes, or new printers can often mean updates to realign or adjust the various fields on your existing check report layout. As a common request from our clients, we thought we would share how you can take care of these to update checks in Dynamics 365 Business Central on your own! Step 1: Download Microsoft Report Builder Since most check layouts are in RDLC format, you will need Microsoft Report Builder to open the file and make edits. To download Microsoft Report Builder for free, simply search for “install Microsoft Report Builder” in your favorite search engine. Step 2: Make a Copy of the Check Report in Custom Report Layouts To make edits to a built-in report, you must first create a copy of the report in Custom Report Layouts. Search for custom report layouts using the search feature in Business Central and choose the related link. On the custom report layout page, select New -> New from the task ribbon at the top of the screen.  In the Insert Built-In Layout for a Report window, select your check layout from the drop down in the Report ID column. In the Insert Built-In Layout for a Report window, select your check layout from the drop down in the Report ID column.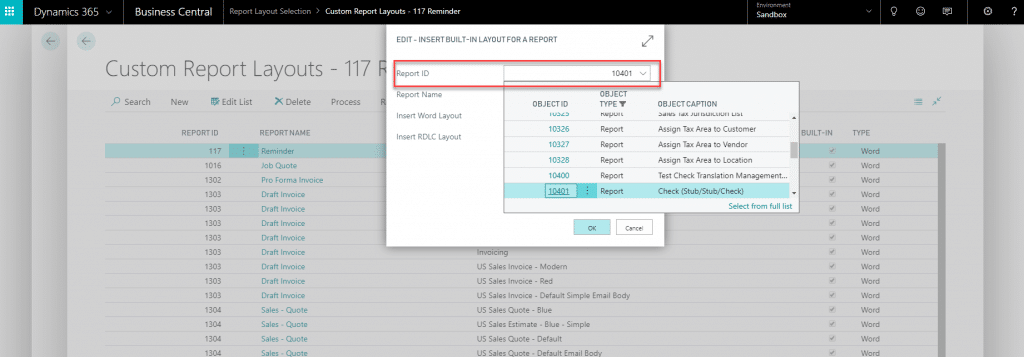 Enable the Insert RDLC Layout Boolean and select OK. Enable the Insert RDLC Layout Boolean and select OK. Step 3: Edit the Custom Report Layout (move the address on your check) Step 3: Edit the Custom Report Layout (move the address on your check)Now for the exciting part – moving the address on your check! Highlight the newly copied report from the Custom Report Layout list and go to Actions -> Export Layout. 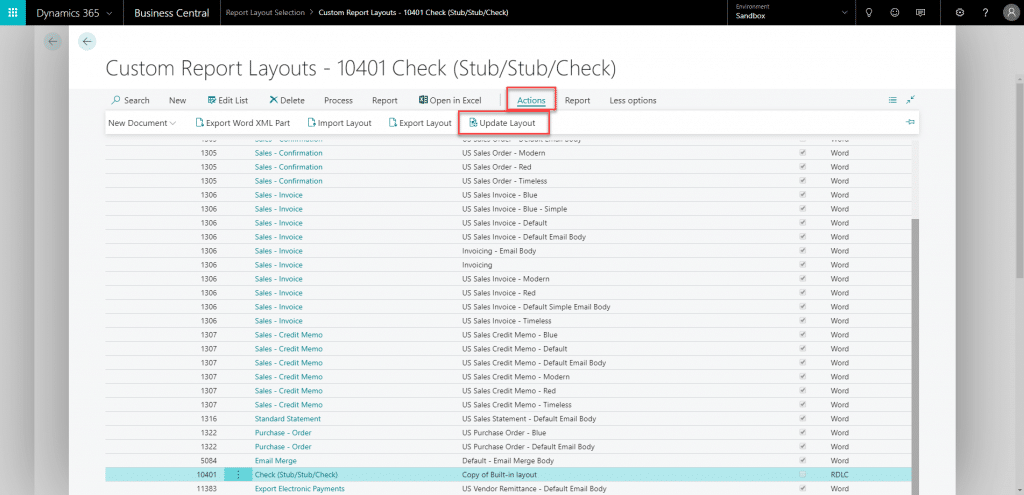 Once downloaded, open your report. Do not be alarmed by the various boxes and seemingly non-sensical letters and words. If you hold up a copy of your check stock next to your computer screen, you will be able to make out the layout of your check. On this layout example, the address is in the lower left-hand corner. Once downloaded, open your report. Do not be alarmed by the various boxes and seemingly non-sensical letters and words. If you hold up a copy of your check stock next to your computer screen, you will be able to make out the layout of your check. On this layout example, the address is in the lower left-hand corner.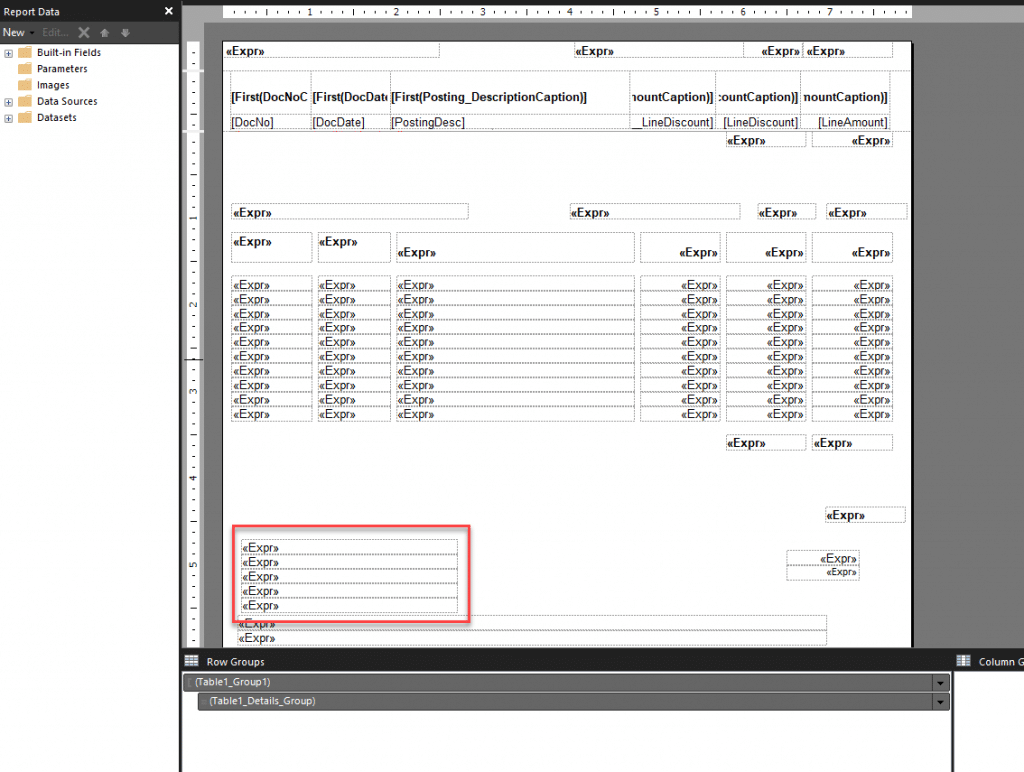 Hold down the Ctrl key on your keyboard and use your mouse to select the multiple boxes. Then simply drag your mouse to adjust the positioning on your report. Hold down the Ctrl key on your keyboard and use your mouse to select the multiple boxes. Then simply drag your mouse to adjust the positioning on your report.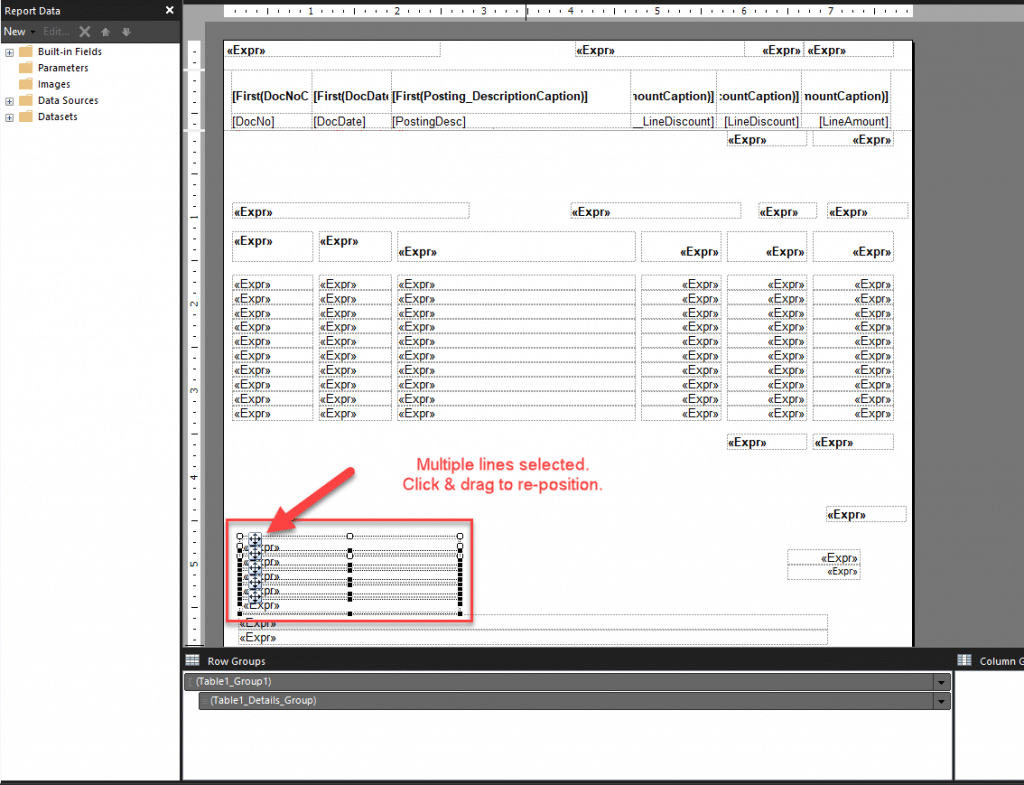 When your changes are complete, save a copy of the report to your computer and close Report Builder. Back in the Custom Report Layouts list, with the custom report still highlighted, go to Actions -> Import Layout. When your changes are complete, save a copy of the report to your computer and close Report Builder. Back in the Custom Report Layouts list, with the custom report still highlighted, go to Actions -> Import Layout.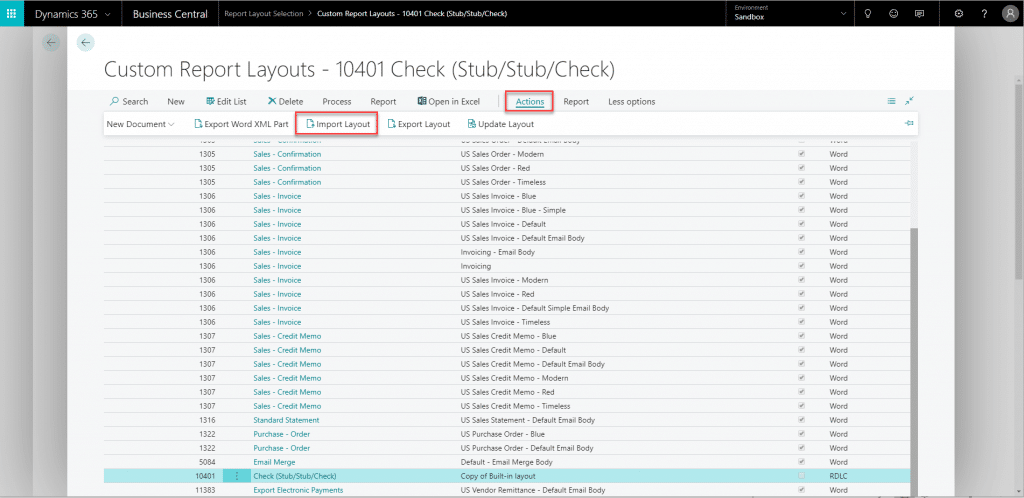 Select Choose and follow the prompts to select your saved file. Select Choose and follow the prompts to select your saved file.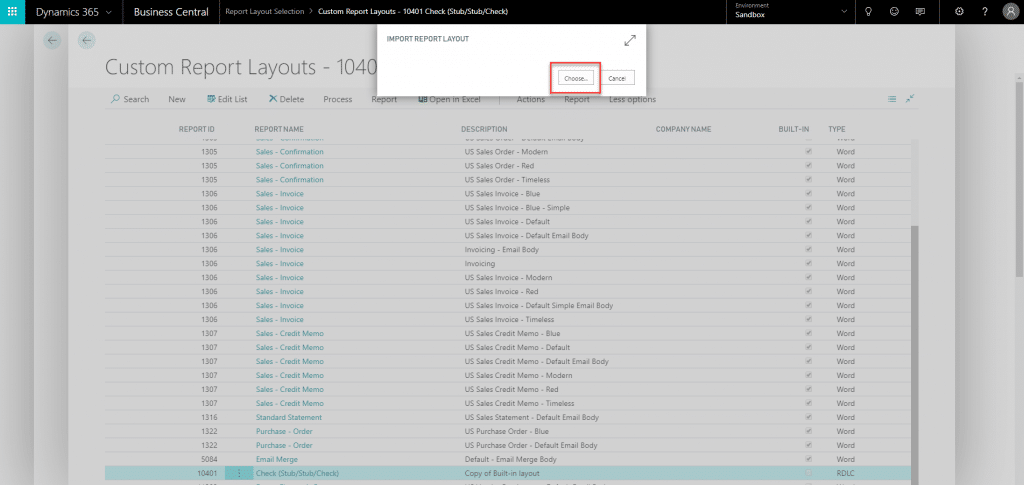 Step 4: Assign the Custom Layout to your Report Selection Step 4: Assign the Custom Layout to your Report SelectionNow that you have created a copy of your report and made the necessary modifications, you will need to assign your custom layout to the Report Layout Selection. Start by searching for report layout selection using the search feature in Business Central and choose the related link. Locate the check report in the list by using the search feature on the page.  Update the Selected Layout field from RDLC (built in) to Custom Layout. Select the assist edit (…) in the Custom Layout Description field to choose your modified report. Update the Selected Layout field from RDLC (built in) to Custom Layout. Select the assist edit (…) in the Custom Layout Description field to choose your modified report. That’s all there is to it! If you do not like your changes, have made a mistake or just want to revert to the stock report until you have a chance to call for help, simply update the Selected Layout field back to RDLC (built in). That’s all there is to it! If you do not like your changes, have made a mistake or just want to revert to the stock report until you have a chance to call for help, simply update the Selected Layout field back to RDLC (built in).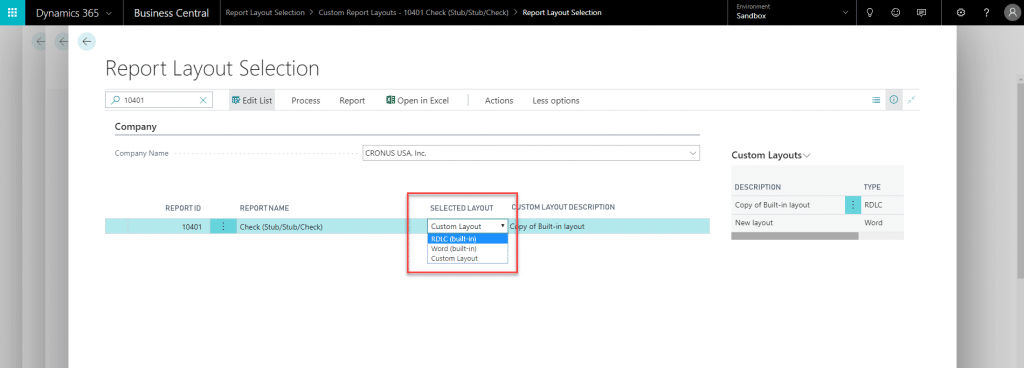 If you have questions on any of the steps outlined here, or encounter any errors when updating the check layout, please reach out to Stoneridge Software for assistance. Happy check printing! If you have questions on any of the steps outlined here, or encounter any errors when updating the check layout, please reach out to Stoneridge Software for assistance. Happy check printing!Источник: https://stoneridgesoftware.com/updat...iness-central/
__________________
Расскажите о новых и интересных блогах по Microsoft Dynamics, напишите личное сообщение администратору. |
|
|
|
|
| Опции темы | Поиск в этой теме |
| Опции просмотра | |
|