|
|
|
|
#1 |
|
Участник
|
atinkerersnotebook: Using the Excel Workbook Designer to Create Data Import Templates
Источник: https://atinkerersnotebook.com/2016/...ort-templates/
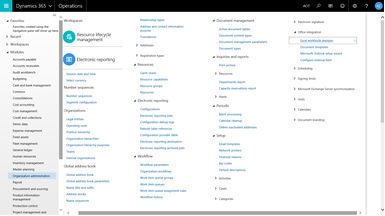
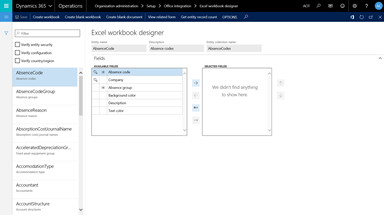
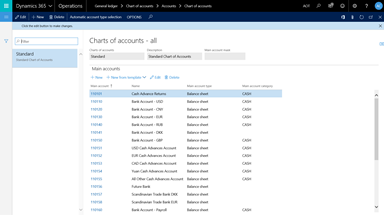
============== In the past importing data into Microsoft Dynamics has been a little bit of work. The Data Management tools within Dynamics 365 for Operations makes it a little easier to package data up into data sets. But if we want an easier way to import in data then there is a second option which is the Excel Workbook Designer which allows us to create Excel templates directly from the data entities and then use them to access and even import data within minutes. In this walkthrough we will show how you can use this feature to do this by creating an import template that imports in Main Accounts in to the ledger. Creating a Main Account Import Template The first thing that we will want to do is create a new Excel Workbook that we will use to import in the data. Luckily this is a super simple task. How to do it… To do this, open up the navigation panel, expand out the Modules group, and click on the Organization administration module and click on the Excel workbook designer menu item within the Office integration subgroup of the Setup menu group.  Alternatively you can search for the Excel workbook designer form by clicking on the search icon in the header of the form (or press ALT+G) and then type in excel into the search box. Then you will be able to select the Excel workbook designer maintenance form from the dropdown list. This will open up the Workbook designer form listing all of the data entities that we can create template from.  We want to create an import template for the Main account data entity so we will start off by filtering down the entities by typing in main into the filter box. That will filter out most of the data entities and then we will be able to select the MainAccount data entity. Also within the Available fields list box we will see all of the fields from the entity that we can use within our import template. Start off by selecting the Chart of accounts field and click on the right arrow button.  This will move the Chart of accounts field over to the Selected fields list box.  Then add the Main account, Name, Main account type and Main account category fields over to the Selected fields list. Now that we have all of the fields that we need to set up the Main Accounts we can click on the Open workbook link within the menu bar.  When the Open in Excel panel is displayed we will then be asked where we want to save the file to. In this example we will just download the file locally and click on the Download button.  This will open up a dialog box and allow us to save the Excel file locally, or just open it up. In this example we just click on the Open option.  This will then open up the Excel template for us. In order to see all of the data and also use the Office Add-In you may be asked to Enable Editing buy clicking on the button in the header.  The add-in will now link up with Microsoft Dynamics, retrieve all of the metadata for the Main Account entity and then retrieve all of the data for the entity as well. We can now see all of the data within Excel that we had within the main interface.  Populating the Import Template Now we have a template that we can use for the import. All that is left to do before we start importing in all of our Main Accounts is to fill in all of the data into the template. How to do it… Step 1: Open the Main Account template To do this we will return back to our Excel workbook and refresh the connection.  Step 2: Enter in the Main Accounts and save the file Now can now enter in all of your main accounts into the templates columns. If you want to use a standard set of main accounts, then we have made this a little simpler and have created a CSV file with all of the necessary Main Accounts that will be used throughout these guides. We have posted them on the Dynamics AX Companions (http://www.dynamicscompanions.com) site. If you don’t want to manually enter in a few hundred accounts, then just download this version them and then copy and paste the data over into the import worksheet.  To update the Main Accounts within Microsoft Dynamics, all we have to do is click on the Publish link within the Office Add-In.  When we return back tour Chart of accounts we will now see that all of the Main accounts have been added to our Standard Chart of accounts.  Conclusion This is a huge improvement over what we used to have to do in order to import in data. We don’t have to even create the connections within Excel, the Worksheet designer does all of this for us. How cool is that! Источник: https://atinkerersnotebook.com/2016/...ort-templates/
__________________
Расскажите о новых и интересных блогах по Microsoft Dynamics, напишите личное сообщение администратору. |
|
|
|
|
|