AXForum  
Вернуться   AXForum > Microsoft Dynamics CRM > Dynamics CRM: Blogs
All
Забыли пароль?
Зарегистрироваться Правила Справка Пользователи Сообщения за день Поиск


Опции темы Поиск в этой теме Опции просмотра
Старый 21.12.2017, 21:15   #1  
Blog bot is offline
Blog bot
Участник
 
25,631 / 848 (80) +++++++
Регистрация: 28.10.2006
powerobjects: How to Create an Auto Number Without Code!
Источник: https://www.powerobjects.com/2017/12...-without-code/
==============


Sometimes if you only have a basic need for an AutoNumber on a record, you may want to implement your own quick process that is controlled by a custom entity, two fields on the entity you want to add the number to, and a workflow. Once in place, you can put a basic number on any entity you would like (custom and out of the box) and more than one number in an entity.

Note: for more complex auto numbers including prefix and suffix, we recommend use the PowerObjects PowerPack add-on PowerAutoNumber.


Let’s look at creating a new contact record where we have updated the contact entity to hold our AutoNumber.

When you create your new contact record, an “on creation” workflow is triggered.

The workflow is in three parts and does the following:
  1. Links the new contact record to the AutoNumber Contact Record
  2. Pulls the value from the AutoNumber record into the Contact Record
  3. The value in the Auto Number record is incremented by 1 so it is ready and waiting for next time
Sounds easy, right? Did we mention there was no code involved? As long as you have a security role that allows you to Create Entities and Workflows, you will be good to go. Let’s break it down stage by stage.

Stage 1. The Custom Entity

First, we need to create a Custom Entity. If you need a few pointers on creating custom entities, check out this guide in The CRM Book.

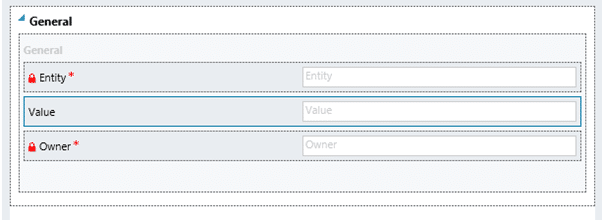
1. Let’s call our custom Entity “AutoNumber”
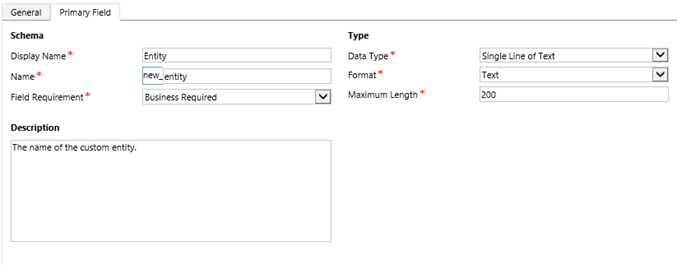
  • You may wish to change the primary field name – we have changed this to “Entity” and increased the field length to 200.
  • If you don’t assign it to a menu, you will always be able to create records from Advanced Find so there is no real importance on where it goes.


2. All you need to create this is one additional field. We’ll call it “Value” but be sure to choose something that works for you – this should be a whole number.


3. Add that Field to the form.


Stage 2. Creating the Fields in the Contact Record

We need to prepare the Entity where we want to populate the number, so in this example we’ll use the contact entity.

1. Create a lookup field called “Contact_AutoNumber” and link that to the AutoNumber Entity.


2. Create a Whole Number field called “Contact#”


3. Add the 2 fields to a form.


Important:

  • Although it may seem like good idea to use a calculated field to bring in the value to the contact record, this won’t work in practice as the value changes each time the workflow is run.
Stage 3. Create an AutoNumber Record

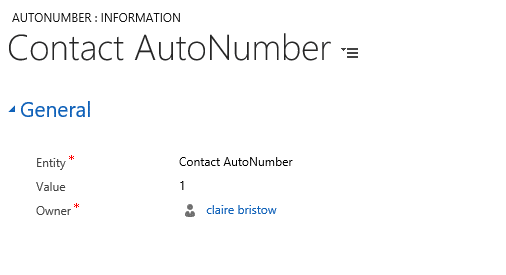
Before you do this step, you will need to publish your changes. You can then create a record in AutoNumber for the contact.

1. Call the Record “Contact AutoNumber”

2. In the value field put in the starting number. This could be 1 or 100,000 – it is your choice.


Things to consider:

  • If you don’t want to start from 1, because the numbers used to be allocated elsewhere, choose a ‘sensible’ gap so there aren’t any overlaps.
Stage 4. Create the Workflows

Create the workflow to make everything work. The workflow isn’t too complicated so even if you are new to them you should be able to continue.

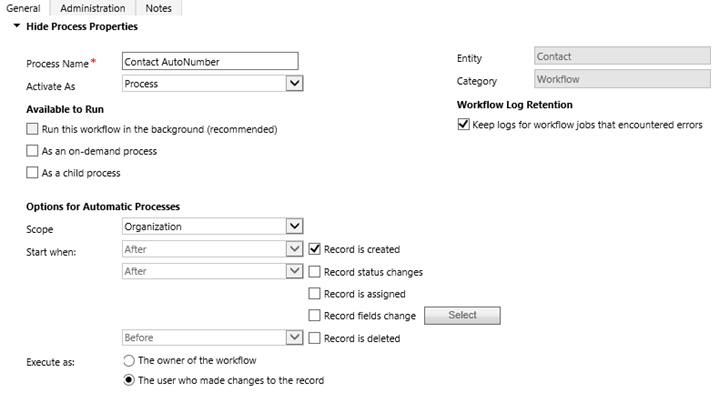
1. Create your workflow called “Contact AutoNumber” against the contact record as a Real-Time Workflow.


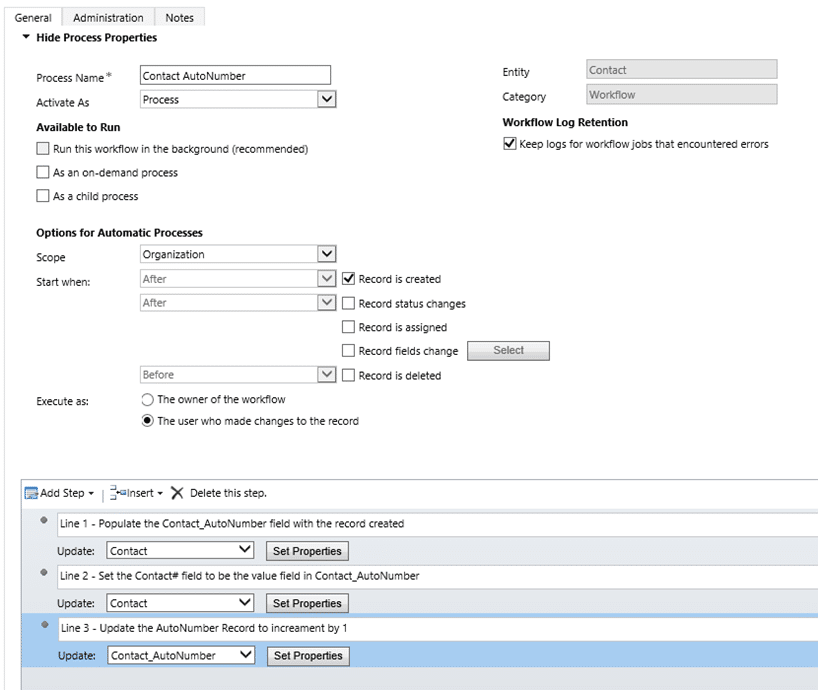
2. Line 1 – Update Contact Record
  • Populate the Contact_AutoNumber field with the record you created in Stage 3


3. Line 2 – Update Contact Record
  • Set the Contact# field to be the value field in Contact_AutoNumber


4. Line 3 – Update the AutoNumber Record
  • Set the value field to increment by 1


5. Your workflow is good to go and can be saved and activated!


Important things to remember:

  • If the workflow is run in background, it can skip numbers or create duplicates. Neither of which are helpful so ensure it is run in real time.
  • If you are liable to import historical information which contains a legacy number, you may want to put a condition as the first step to say that if “value contains data” to stop or remember to deactivate the workflow before importing.
Stage 5. Let’s test it out

1. Create a new contact record.


2. Then create another one.


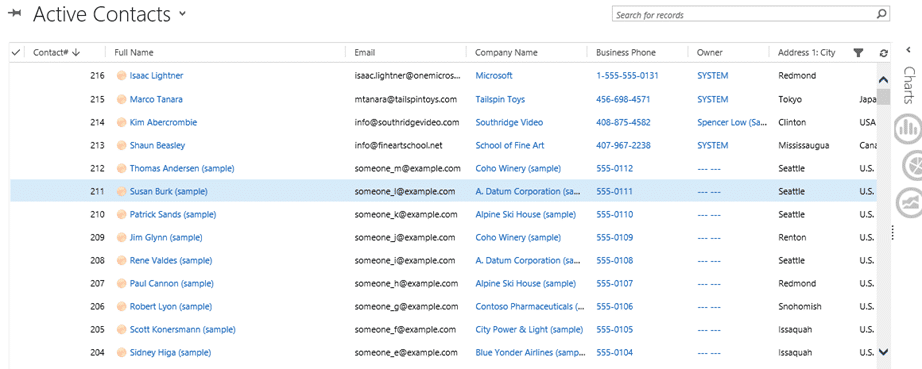
3. Have your numbers pulled through?


Hopefully you have an idea on how this process works. If you wish to create an AutoNumber in more than one entity just repeat stages 2 – 5.

Stage 6. Extras

Now that everything works, you may want to do a little housekeeping.
  • Have you allowed edit of the AutoNumber entity for your users? If they can’t edit they won’t be able to increment the number as part of the workflow.

  • Do you want the fields on the contact record visible and editable? It is sensible to make both “read only” so that you have control over the field and users can’t manually update it.

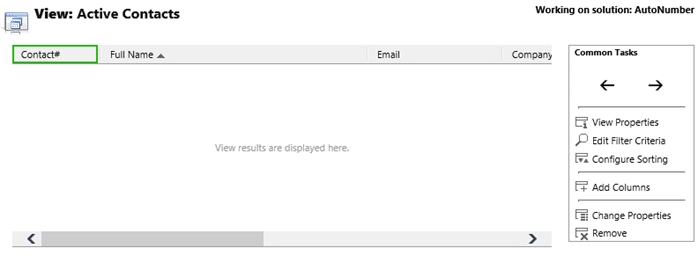
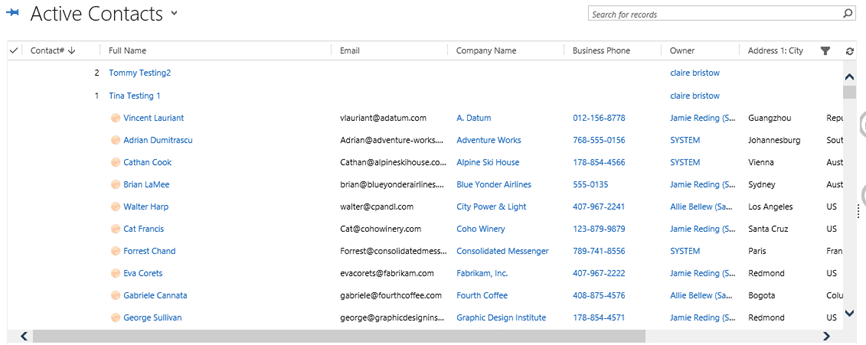
  • Do you want the Contact# Field visible on your views?


  • Have you made Contact# a searchable field?


  • If you also make the workflow “on demand” you can run this on items previously created.


Get more helpful Dynamics 365 tips and tricks by subscribing to our blog!

Happy Dynamics 365’ing!


Источник: https://www.powerobjects.com/2017/12...-without-code/
__________________
Расскажите о новых и интересных блогах по Microsoft Dynamics, напишите личное сообщение администратору.
 

Похожие темы
Тема Автор Раздел Ответов Посл. сообщение
saurav-nav: NAV 2018 - Lots of New Objects! Blog bot NAV: Blogs 0 04.12.2017 10:11
emeadaxsupport: How to auto-populate the Country/Region code when adding addresses in Dynamics AX 2012 Blog bot DAX Blogs 0 21.04.2015 18:11
atinkerersnotebook: Walkthrough & Tutorial Summary Blog bot DAX Blogs 1 09.09.2013 09:11
CRM DE LA CREME! Some more useful javascripts for MS CRM Blog bot Dynamics CRM: Blogs 0 04.05.2010 11:05
wiki.dynamicsbook: Changes Made in Navision Attain 3.60 Blog bot Dynamics CRM: Blogs 0 02.09.2008 13:23

Ваши права в разделе
Вы не можете создавать новые темы
Вы не можете отвечать в темах
Вы не можете прикреплять вложения
Вы не можете редактировать свои сообщения

BB коды Вкл.
Смайлы Вкл.
[IMG] код Вкл.
HTML код Выкл.
Быстрый переход

Рейтинг@Mail.ru
Часовой пояс GMT +3, время: 13:05.